Key Factors Behind Drainage in the Bathtub

Call Today


What're your concepts about Why is Sewage Backing Up Into My Bathtub??


Why sewage is coming up through your bathtub
Sewage back-up in the bath tub can be a traumatic and unhygienic issue for any homeowner. Not just is it bothersome, yet it likewise positions significant wellness threats and suggests underlying issues with the plumbing system. Recognizing why sewage is showing up via the tub is essential for taking appropriate activity to address the problem properly.


Introduction to the Concern


Typical Factors for Sewer Backup


Obstructions in the Sewage System Line


One of the most usual sources of sewage backup is a clog in the sewage system line. This can occur as a result of the build-up of debris, grease, or foreign objects in the pipes, stopping correct flow and causing sewage to back up into your tub.


Tree Origin Intrusion


Tree roots looking for moisture and nutrients can infiltrate drain lines via tiny cracks or joints. Over time, these roots can grow and expand, causing significant damages to the pipelines and leading to sewer back-up concerns.


Recognizing the Trouble


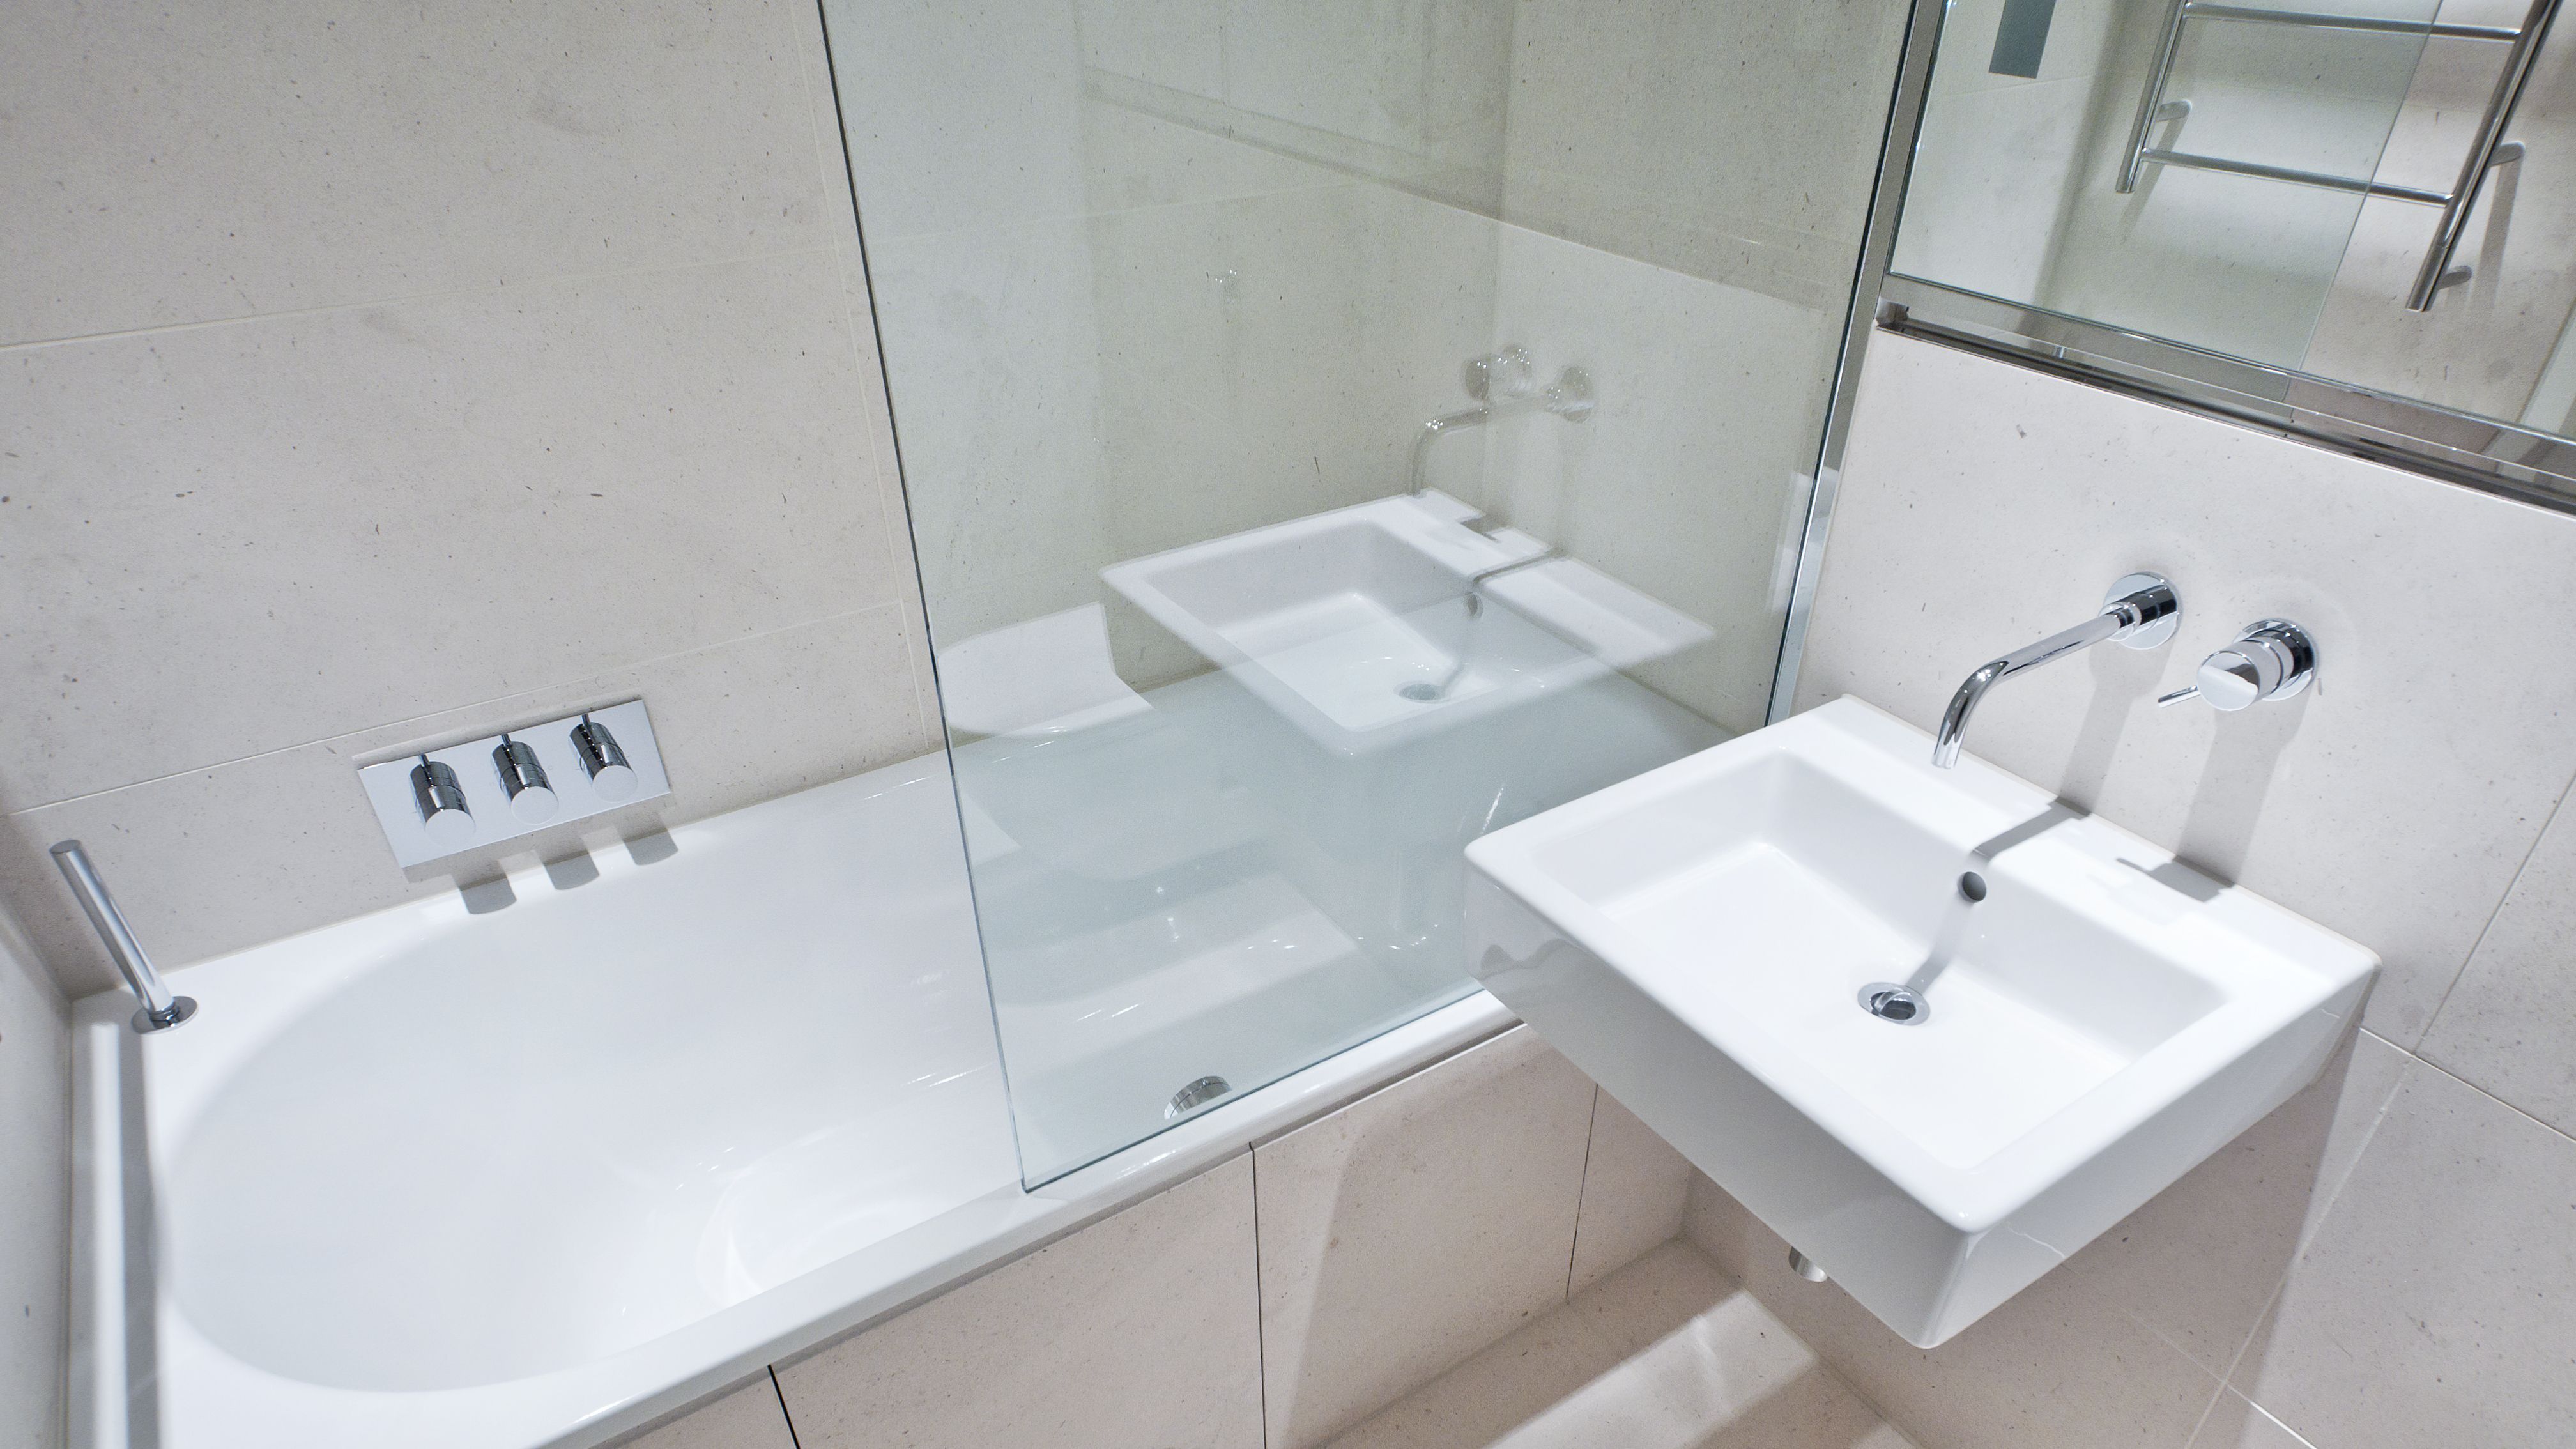
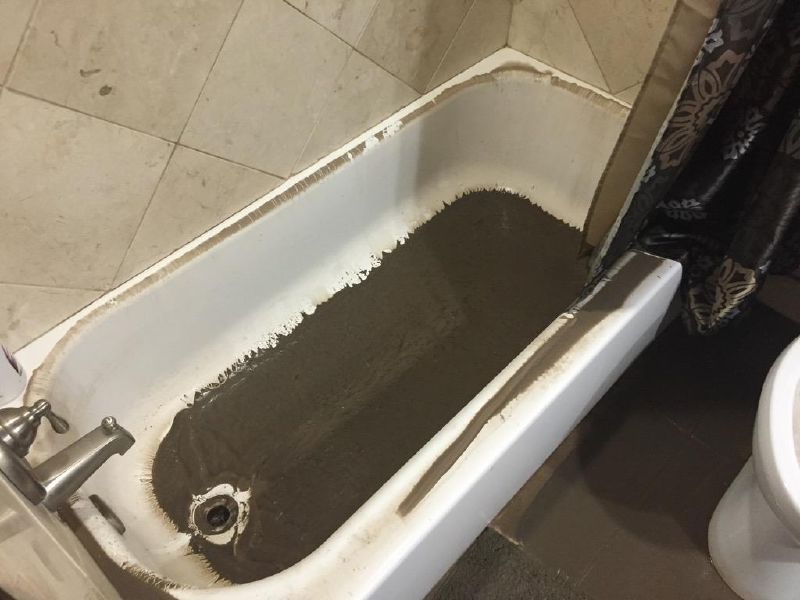
When sewer draws back up into the tub, it's a clear indication of a problem with the drainage system. The wastewater that needs to be moving far from your home is instead finding its back into your living space, which can result in significant damage and carcinogen.


Possible Reasons


Several factors can add to sewage back-up in the tub. From obstructions in the sewer line to concerns with the plumbing framework, identifying the source is vital for finding a solution.


Aging Framework


Older homes may have obsoleted plumbing systems that are a lot more vulnerable to corrosion, splits, and degeneration. As pipelines age, they end up being more susceptible to leaks and clogs, boosting the possibility of sewer backup cases.


Heavy Rainfall or Flooding


During durations of heavy rainfall or flooding, the drain system may become overwhelmed with excess water, creating backups and overflows. This can lead to sewer supporting into tubs and various other components inside the home.


Indications of Sewer Backup


Foul Odors


Undesirable smells emanating from drains pipes or fixtures, especially in the restroom, might indicate sewage back-up issues. These odors are commonly solid and consistent, signifying a trouble that calls for immediate focus.


Slow Draining Fixtures


Bathtubs, sinks, and bathrooms that drain gradually or otherwise at all could be experiencing sewage back-up. If numerous fixtures are affected concurrently, it's most likely that the issue originates from a typical point, such as the primary sewage system line.


Gurgling Sounds


Strange gurgling or bubbling sounds originating from drains when water is running somewhere else in your house are a sign of air trapped in the plumbing system. This air accumulation can arise from sewer backup and must be explored quickly.


Health And Wellness Dangers Connected With Sewage Backup


Contamination of Supply Of Water


Sewer backup can infect the water supply in your house, positioning a severe health danger to you and your family. Exposure to contaminated water can lead to gastrointestinal concerns, skin infections, and various other ailments.


Mold Development


Dampness from sewer backup can create perfect conditions for mold and mildew growth in your house. Mold and mildew spores can worsen respiratory system issues and create allergies in sensitive individuals, making punctual cleanup important.


Spread of Condition


Sewer includes hazardous bacteria, infections, and bloodsuckers that can cause a series of illness, consisting of liver disease, cholera, and gastroenteritis. Entering contact with sewage or infected surfaces places you at risk of infection.


Cleaning Up After Sewer Backup


Sanitation Procedures


Thoroughly decontaminate and sanitize affected locations after sewage backup to get rid of unsafe germs and prevent mold and mildew growth. Usage ideal cleaning items and protective gear to ensure secure and efficient clean-up.


Remediation of Impacted Locations


Fix any damage to flooring, wall surfaces, or fixtures triggered by sewer back-up. Depending on the level of the damage, you may need to change carpeting, drywall, or various other products to recover your home to its pre-loss condition.


Immediate Actions to Take


Shutting Off Water Supply


In case of sewer back-up, it's necessary to shut off the water system to stop further contamination and damages. Find the major water shutoff valve in your home and shut it off till the issue can be settled.


Speaking To an Expert Plumber


Dealing with sewage back-up is not a do it yourself job. Contact an accredited plumber with experience in handling sewage-related issues to examine the scenario and perform essential repairs or clean-ups.


Preventing Contact with Polluted Water


Until the sewage backup is dealt with, stay clear of contact with infected water to prevent the spread of microorganisms and microorganisms. Use protective equipment if you need to remain in the affected area and wash your hands thoroughly afterward.


Preventive Measures


Normal Upkeep of Sewage System Lines


Arrange regular assessments and upkeep of your drain lines to identify and resolve possible problems prior to they escalate right into significant issues. This can consist of cleaning particles, checking for tree root breach, and repairing any broken pipes.


Installing Bayou Valves


Think about installing bayou shutoffs in your plumbing system to avoid sewer from receding into your home during durations of heavy rainfall or flooding. These valves immediately close when water draws back up, shielding your property from contamination.


Correct Disposal of Home Waste


Avoid purging anything aside from bathroom tissue and human waste down the bathroom to prevent blockages and clogs in the sewer line. Dispose of grease, oil, and other home chemicals correctly to decrease the danger of plumbing problems.


Why Is Water Backing Up in My Bathtub When I Flush My Toilet?


What to do about a sewer line clog


First, don’t bother with plunging. No amount of plunging will dislodge the clog in a sewer line. The clog is too far away. Plungers are for clogs in the toilet itself, not the sewer line. Plus, the most likely causes of a sewer clog are:


  • Tree roots


  •  
  • Flushed toys or feminine products


  •  
  • Grease buildup


  •  

Those items don’t move easily. And in the case of tree roots, the roots need to be cut out of the pipe and the pipe will need to be repaired.


You’ll need a closet auger. A closet auger is a type of plumber’s snake with a protective cover to keep from scratching the delicate porcelain toilet. If the clog is further down, you may need to remove the toilet or use one of your cleanouts to get to the clog.


We also recommend doing a video inspection of the drain to ensure that the cause of the clog has been completely removed. Otherwise, you could have the same problem again in a few days or weeks.


https://mspplumbingheatingair.com/blog/why-is-water-backing-up-in-my-bathtub-when-i-flush-my-toilet


Why sewage is coming up through your bathtub


I discovered that post on Water Coming up Bathtub Drain when perusing the web. Do you know someone else who is fascinated about the subject? Be sure promote it. Thank you for going through it.


Click Here

How to Replace a Tub in Your Bathroom

Request Free Estimate


We've stumbled upon this post involving How to Install a Bathtub below on the web and figured it made sense to relate it with you over here.


Tools You Need to Install a New Bathtub
Mounting a bath tub isn't specifically rocket science, yet it does need strong plumbing, woodworking, and also occasionally, tiling skills. Replacing an old bathtub with a new one is also a moderately challenging project. If the old tub is conveniently accessible, the project can move quickly; if you have to open a wall to remove the old tub and position the new bathtub, the job is a lot harder. In either situation, the job is within a house handyman's abilities, although you will require an assistant to vacate the old bathtub and also embeded in the brand-new one. Make sure you have actually certified on your own for the task as well as are comfortable attempting it. Rather than hiring a contractor to take control of a halfway-completed task, it is far better to think about using one prior to you start. Possibilities are you may need a professional plumber to make tube connections.
This article will certainly aid you set up a new bathtub in your washroom if you have actually already bought a new bathtub as well as don't require to alter the setup of your previous water system pipes.
Your devices and also material checklist must make up the following:


  • New Bathtub

  • Hammer

  • Pipeline Wrenches

  • Prybar

  • Safety Glasses

  • Degree

  • Pliers

  • Adjustable Wrench

  • Putty Blade

  • Screwdriver

  • Cold Blade

  • Measuring tape

  • Pipeline Caps


  •  

Preparing for the Setup


To start with, the supporting structure supplied with the bathroom must be fitted (if needed) according to the producer's instructions. Next off, fit the taps or mixer to the bath tub. When suitable the faucet block, it is essential to make sure that if the faucet includes a plastic washing machine, it is fitted in between the bathroom as well as the faucets. On a plastic bathroom, it is also reasonable to fit a supporting plate under the taps unit to stop stress on the bath tub.
Fit the versatile tap adapters to the bottom of the two faucets utilizing 2 nuts and also olives (often provided with the tub). Fit the plug-hole outlet by smearing mastic filler round the sink electrical outlet hole, and afterwards pass the outlet via the hole in the bathroom. Use the nut provided by the manufacturer to fit the plug-hole. Take a look at the plug-hole outlet for an inlet on the side for the overflow pipeline.
Next, fit completion of the versatile overflow pipeline to the overflow outlet. Afterwards, screw the pipe to the overflow face which need to be fitted inside the bath. Ensure you make use of all of the supplied washing machines.
Connect the trap to the bottom of the waste outlet on the tub by winding the string of the waste outlet with silicone mastic or PTFE tape, as well as screw on the catch to the electrical outlet. Connect the bottom of the overflow tube in a comparable manner.The bathroom should now prepare to be suited its last position.


Removing Old Taps


If you need to change old faucets with new ones as a part of your installation, then the first thing you must do is separate the supply of water. After doing so, activate the taps to drain any water staying in the system. The procedure of removing the existing taps can be rather bothersome as a result of the restricted gain access to that is commonly the case.
Utilize a container wrench (crowsfoot spanner) or a tap device to reverse the nut that connects the supply pipes to the faucets. Have a towel ready for the remaining water that will certainly originate from the pipelines. Once the supply pipes have actually been removed, utilize the very same device to loosen the nut that holds the taps onto the bath/basin. You will require to quit the solitary taps from turning during this procedure. As soon as the taps have actually been gotten rid of, the holes in the bath/basin will certainly have to be cleaned of any type of old sealing substance.
Prior to going on to fit the new taps, compare the pipe links on the old faucets to the new taps. If the old taps are longer than the new taps, then a shank adapter is needed for the brand-new faucets to fit.


Mounting the Bath tub


Using the two wood boards under its feet, position the bath tub in the called for placement. The wooden boards are useful in evenly spreading the weight of the bathtub over the area of the boards instead of focusing all the weight onto four tiny factors.
The following objective is to make certain that the bath tub is leveled all round. This can be attained by examining the level as well as adjusting the feet on the bathtub until the level reviews level.
To mount faucets, fit all-time low of the furthest flexible faucet adapter to the proper supply pipe by making a compression join; then do the very same for the various other tap.
Activate the water system as well as check all joints and also brand-new pipework for leaks and tighten them if essential. Load the tub and additionally inspect the overflow outlet and the typical outlet for leakages.
Lastly, repair the bath paneling as defined in the manufacturer's user's manual. Tiling as well as sealing around the bathtub should wait till the bath tub has been made use of at the very least once as this will resolve it right into its final position.


Suitable New Touches


If the tails of the new taps are plastic, after that you will certainly need a plastic adapter to avoid damage to the string. One end of the adapter fits on the plastic tail of the tap and also the other end provides a link to the existing supply pipes.
If you require to fit a monobloc, after that you will call for minimizing couplers, which connects the 10mm pipeline of the monobloc to the common 15mm supply pipe.
Next off, position the faucet in the mounting opening in the bath/basin guaranteeing that the washing machines are in place in between the tap and also the sink. Secure the faucet in position with the producer given backnut. When the faucet is securely in position, the supply pipes can be attached to the tails of the faucets. The taps can either be linked by utilizing corrugated copper piping or with typical faucet connectors. The former kind should be attached to the tap finishes first, tightening up just by hand. The supply pipes can later on be linked to the various other end. Tighten both ends with a spanner after both ends have actually been connected.


Tiling Around the Bath tub


In the area where the bath fulfills the tile, it is needed to secure the accompanies a silicone rubber caulking. This is essential as the installation can relocate enough to split an inflexible seal, causing the water to penetrate the wall in between the bath as well as the tiling, causing complications with moisture and possible leakages to the ceiling listed below.
You can choose from a range of coloured sealers to assimilate your fixtures as well as installations. They are marketed in tubes and cartridges, as well as can sealing spaces approximately a width of 3mm (1/8 inch). If you have a larger space to fill up, you can fill it with spins of drenched newspaper or soft rope. Keep in mind to constantly fill the tub with water prior to securing, to permit the movement experienced when the tub remains in use. The sealant can crack fairly early if you do not consider this motion before sealing.
Additionally, ceramic coving or quadrant floor tiles can be made use of to border the bathroom or shower tray. Plastic strips of coving, which are easy to use and also reduce to dimension, are additionally conveniently readily available on the marketplace. It is a good idea to fit the floor tiles utilizing waterproof or water resistant glue and also cement.


A Step-by-Step Guide to Installing a Bathtub


Is your bathtub looking a bit dated lately? Believe it or not, installing a new one is a project you can do yourself. Whether your bathtub is broken or doesn’t fit in with your current bathroom’s design, you can fix it without having to hire a contractor or paying labour costs.


But, beyond saving money, there are other benefits of installing your own bathtub. When you do this project yourself, you can customise every step of the process. You can also make sure the finished product looks exactly the way you want it to.


This DIY project is quite involved, but by doing some research, preparing your bathroom and using the right equipment, it is definitely one you can take on. This guide will help you understand the technical procedures behind installing a new bathtub.


Remove the Existing Bathtub


To remove the old bathtub, you will need to turn the water supply off before you start any work. After you turn the water off, there will likely still be some water left in your plumbing system, which you can remove by turning on a faucet below the level of the bathtub. Once the water stops running, you are ready to start working.


The easiest way to remove the tub is to remove the faucet, handles and other piping and then pull the tub out from the wall. If this doesn’t work in your situation, you will need to remove part of the wall, remove the piping and then slide the tub out.


Choose the Right Bathtub


The ideal way to replace your bathtub is to find one that has the exact dimensions and has the drain and faucet on the same side as your old one. This way, it will fit in the same place and you won’t have to change the piping system in your bathroom. Choose a tub that matches your home’s decor and fits with the style of the bathroom.


Install the Plumbing and Ledger Board


You can purchase a tub drain kit at a hardware store which will have all the pieces you will need for your new tub’s plumbing. Follow the instructions that came with the kit to install the plumbing in the new tub and then take measurements to make sure the plumbing in the tub will align with the plumbing in your bathroom. If it doesn’t, now is the time to make necessary adjustments.


Some bathtubs need a ledger board that is installed on the wall behind the tub to help support it. If your new bathtub requires one, the directions that came with it will tell you how high it should be installed. If your old bathtub had a ledger board, and it is still in good condition, you can adjust its height to match the new bathtub.


Install the Bathtub


When the plumbing and ledger board are ready, you can install the new bathtub. Carefully lower it into the space, being careful not to damage the tub, wall, plumbing or ledger board. Since bathtubs are very heavy and you will need to line the tub up exactly, it is wise to have someone help you with this step.


Once the tub is in place, it needs to be perfectly level, so use a bubble level instead of estimating how level the tub is. Put the level on the top edge of the tub, not the bottom on the inside, since many tubs are designed with a sloped bottom.


If the bathtub isn’t level, adjust the ledger board and shift the tub until it is. When it is level, use screws to attach the tub to the wall studs. Most bathtubs have pre-drilled holes in the upper flange, so use these but do not over tighten the screws.


Hook up the Plumbing


Now that the bathtub is installed, it needs to be attached to your plumbing system. First, install the shoe fitting under the tub and drain pipe, then the overflow pipe and then the drain flange. Your tub plumbing kit will include specific instructions on how to install these pieces.


Install the Bathtub Surround


A bathtub surround will protect the walls around the tub from water damage and can give your new bathtub a more finished look. To install one, make sure the wall is completely clean and dry so that the adhesive will be able to hold the surround securely. Then, measure the surround and mark the same dimensions on the wall above the tub.


Following the directions that came with the surround adhesive, apply it to the wall. Press the surround against the wall on top of the adhesive and then pull it away for about three minutes to activate the adhesive, then apply the surround again. Keep in mind that this is the most common way to use an adhesive, but you should check the instructions on the package for any special steps.


If there is any excessive adhesive around the sides of the surround, you can use mineral spirits to remove it. Then use masking tape to hold the surround panels in place until the adhesive is dry. Using silicone, seal all the cracks between the surround panels and the gap between the bottom of the panels and the top of the bathtub.


If you want to install tile above your bathtub, instead of a bathtub surround, the process will be very similar. But, you will need to measure and cut tiles and install each one individually, using tile spacers to make sure they are evenly spaced. You will then use grout to fill in the spaces between the tiles.

https://www.hss.com/blog/bathroom/a-step-by-step-guide-to-installing-a-bathtub/


How to Install a Bathtub: Install an Acrylic Tub and Tub Surround


We had been shown that article about Installing A Bathtub through a good friend on a different web property. Do you know someone else who is interested by A Step-by-Step Guide to Installing a Bathtub? Be sure share it. We love reading our article about How to Install a Bathtub.


Contact Us Today

Do It Yourself Bathtub Installation.

Schedule Your Job Now


Are you currently searching for insight on Tools You Need to Install a New Bathtub ?


A Step-by-Step Guide to Installing a Bathtub
Installing a tub isn't specifically brain surgery, but it does need strong plumbing, carpentry, as well as often, tiling abilities. Changing an old bath tub with a new one is also a moderately tough task. If the old tub is readily easily accessible, the job can relocate easily; if you have to open a wall to eliminate the old bathtub and also place the brand-new bathtub, the task is much harder. In either situation, the job is within a residence handyman's abilities, although you will certainly require a helper to move out the old bathtub and also embeded in the brand-new one. Make sure you have qualified yourself for the job as well as are comfortable trying it. Instead of working with a specialist to take control of a halfway-completed job, it is much better to take into consideration using one prior to you start. Opportunities are you might require an expert plumber to make tube connections.
This short article will assist you set up a new tub in your restroom if you have already acquired a brand-new bathtub and also do not require to alter the plan of your previous water system pipes.
Your tools and material checklist should make up the following:


  • New Tub

  • Hammer

  • Pipe Wrenches

  • Prybar

  • Safety Glasses

  • Level

  • Pliers

  • Flexible Wrench

  • Putty Blade

  • Screwdriver

  • Cold Knife

  • Measuring tape

  • Pipe Caps


  •  

Getting ready for the Installation


To start with, the sustaining frame supplied with the bathroom needs to be fitted (if needed) according to the maker's guidelines. Next off, fit the taps or mixer to the bathtub. When fitting the faucet block, it is necessary to make certain that if the tap features a plastic washing machine, it is fitted between the bath and also the faucets. On a plastic bath, it is also reasonable to fit a sustaining plate under the taps unit to stop pressure on the bath tub.
Fit the adaptable tap connectors to the bottom of both faucets using 2 nuts and olives (occasionally supplied with the bathtub). Fit the plug-hole electrical outlet by smearing mastic filler round the sink electrical outlet opening, and then pass the electrical outlet with the hole in the bath. Use the nut provided by the supplier to fit the plug-hole. Take a look at the plug-hole outlet for an inlet on the side for the overflow pipe.
Next, fit completion of the versatile overflow pipe to the overflow electrical outlet. After that, screw the pipe to the overflow face which need to be fitted inside the bathroom. Ensure you use every one of the supplied washers.
Attach the catch to the bottom of the waste outlet on the bath tub by winding the thread of the waste outlet with silicone mastic or PTFE tape, and screw on the catch to the outlet. Attach the bottom of the overflow tube in a comparable manner.The bath need to now prepare to be fitted in its last setting.


Removing Old Taps


If you require to replace old faucets with new ones as a part of your installment, then the first thing you need to do is detach the water. After doing so, switch on the faucets to drain any type of water remaining in the system. The process of getting rid of the existing taps can be fairly troublesome due to the limited access that is often the situation.
Use a container wrench (crowsfoot spanner) or a faucet tool to undo the nut that connects the supply pipelines to the taps. Have a fabric all set for the remaining water that will certainly originate from the pipes. As soon as the supply pipes have actually been eliminated, utilize the same device to loosen the nut that holds the taps onto the bath/basin. You will certainly need to quit the single faucets from turning throughout this procedure. When the faucets have actually been eliminated, the holes in the bath/basin will certainly have to be cleaned of any kind of old sealing substance.
Prior to moving on to fit the new faucets, contrast the pipe connections on the old faucets to the new faucets. If the old faucets are longer than the new faucets, then a shank adapter is required for the new faucets to fit.


Installing the Bathtub


Making use of both wooden boards under its feet, position the bathtub in the needed placement. The wooden boards are handy in evenly spreading the weight of the bath tub over the area of the boards rather than concentrating all the weight onto 4 little factors.
The following goal is to guarantee that the tub is leveled all round. This can be accomplished by examining the level and adjusting the feet on the tub up until the level checks out level.
To set up faucets, fit all-time low of the outermost adaptable tap connector to the appropriate supply pipe by making a compression join; then do the exact same for the various other tap.
Switch on the supply of water as well as inspect all joints as well as brand-new pipework for leakages and also tighten them if essential. Load the bath tub as well as additionally examine the overflow outlet as well as the typical outlet for leaks.
Lastly, deal with the bathroom paneling as defined in the supplier's user's manual. Tiling and also securing around the bath tub must wait till the bath tub has actually been utilized a minimum of when as this will settle it into its final position.


Suitable New Touches


If the tails of the brand-new faucets are plastic, then you will certainly require a plastic adapter to avoid damage to the thread. One end of the connector fits on the plastic tail of the tap and also the various other end supplies a link to the current supply pipelines.
If you need to fit a monobloc, then you will need decreasing couplers, which links the 10mm pipe of the monobloc to the conventional 15mm supply pipe.
Next, position the tap in the mounting hole in the bath/basin ensuring that the washers are in place between the tap and also the sink. Safeguard the faucet in place with the producer offered backnut. Once the faucet is firmly in position, the supply pipes can be connected to the tails of the faucets. The faucets can either be linked by using corrugated copper piping or with normal tap adapters. The previous kind ought to be connected to the faucet ends initially, tightening just by hand. The supply pipelines can later be attached to the various other end. Tighten up both ends with a spanner after both ends have been attached.


Tiling Around the Tub


In the area where the bathroom satisfies the tile, it is essential to seal the joins with a silicone rubber caulking. This is necessary as the fitting can relocate enough to crack a stiff seal, causing the water to pass through the wall in between the bathroom and the tiling, resulting in complications with moisture and also feasible leaks to the ceiling listed below.
You can choose from a range of coloured sealants to assimilate your fixtures and also fittings. They are marketed in tubes and cartridges, as well as can sealing voids as much as a size of 3mm (1/8 inch). If you have a larger void to fill, you can load it with twists of drenched newspaper or soft rope. Keep in mind to constantly fill the tub with water prior to sealing, to permit the movement experienced when the bathtub is in use. The sealer can break rather early if you do not think about this movement before securing.
Conversely, ceramic coving or quadrant tiles can be utilized to border the bath or shower tray. Plastic strips of coving, which are easy to use as well as reduce to size, are likewise conveniently offered on the marketplace. It is a good idea to fit the floor tiles using waterproof or waterproof sticky as well as cement.


A Step-by-Step Guide to Installing a Bathtub


Is your bathtub looking a bit dated lately? Believe it or not, installing a new one is a project you can do yourself. Whether your bathtub is broken or doesn’t fit in with your current bathroom’s design, you can fix it without having to hire a contractor or paying labour costs.


But, beyond saving money, there are other benefits of installing your own bathtub. When you do this project yourself, you can customise every step of the process. You can also make sure the finished product looks exactly the way you want it to.


This DIY project is quite involved, but by doing some research, preparing your bathroom and using the right equipment, it is definitely one you can take on. This guide will help you understand the technical procedures behind installing a new bathtub.


Remove the Existing Bathtub


To remove the old bathtub, you will need to turn the water supply off before you start any work. After you turn the water off, there will likely still be some water left in your plumbing system, which you can remove by turning on a faucet below the level of the bathtub. Once the water stops running, you are ready to start working.


The easiest way to remove the tub is to remove the faucet, handles and other piping and then pull the tub out from the wall. If this doesn’t work in your situation, you will need to remove part of the wall, remove the piping and then slide the tub out.


Choose the Right Bathtub


The ideal way to replace your bathtub is to find one that has the exact dimensions and has the drain and faucet on the same side as your old one. This way, it will fit in the same place and you won’t have to change the piping system in your bathroom. Choose a tub that matches your home’s decor and fits with the style of the bathroom.


Install the Plumbing and Ledger Board


You can purchase a tub drain kit at a hardware store which will have all the pieces you will need for your new tub’s plumbing. Follow the instructions that came with the kit to install the plumbing in the new tub and then take measurements to make sure the plumbing in the tub will align with the plumbing in your bathroom. If it doesn’t, now is the time to make necessary adjustments.


Some bathtubs need a ledger board that is installed on the wall behind the tub to help support it. If your new bathtub requires one, the directions that came with it will tell you how high it should be installed. If your old bathtub had a ledger board, and it is still in good condition, you can adjust its height to match the new bathtub.


Install the Bathtub


When the plumbing and ledger board are ready, you can install the new bathtub. Carefully lower it into the space, being careful not to damage the tub, wall, plumbing or ledger board. Since bathtubs are very heavy and you will need to line the tub up exactly, it is wise to have someone help you with this step.


Once the tub is in place, it needs to be perfectly level, so use a bubble level instead of estimating how level the tub is. Put the level on the top edge of the tub, not the bottom on the inside, since many tubs are designed with a sloped bottom.


If the bathtub isn’t level, adjust the ledger board and shift the tub until it is. When it is level, use screws to attach the tub to the wall studs. Most bathtubs have pre-drilled holes in the upper flange, so use these but do not over tighten the screws.


Hook up the Plumbing


Now that the bathtub is installed, it needs to be attached to your plumbing system. First, install the shoe fitting under the tub and drain pipe, then the overflow pipe and then the drain flange. Your tub plumbing kit will include specific instructions on how to install these pieces.


Install the Bathtub Surround


A bathtub surround will protect the walls around the tub from water damage and can give your new bathtub a more finished look. To install one, make sure the wall is completely clean and dry so that the adhesive will be able to hold the surround securely. Then, measure the surround and mark the same dimensions on the wall above the tub.


Following the directions that came with the surround adhesive, apply it to the wall. Press the surround against the wall on top of the adhesive and then pull it away for about three minutes to activate the adhesive, then apply the surround again. Keep in mind that this is the most common way to use an adhesive, but you should check the instructions on the package for any special steps.


If there is any excessive adhesive around the sides of the surround, you can use mineral spirits to remove it. Then use masking tape to hold the surround panels in place until the adhesive is dry. Using silicone, seal all the cracks between the surround panels and the gap between the bottom of the panels and the top of the bathtub.


If you want to install tile above your bathtub, instead of a bathtub surround, the process will be very similar. But, you will need to measure and cut tiles and install each one individually, using tile spacers to make sure they are evenly spaced. You will then use grout to fill in the spaces between the tiles.

https://www.hss.com/blog/bathroom/a-step-by-step-guide-to-installing-a-bathtub/


A Step-by-Step Guide to Installing a Bathtub


As an enthusiastic reader about How to Install a Bathtub Yourself, I was thinking sharing that information was a smart idea. Enjoyed reading our piece? Please share it. Help someone else check it out. Thank-you for going through it.


Give Me A Quote!

1 2 3 4 5 6 7 8 9 10 11 12 13 14 15